
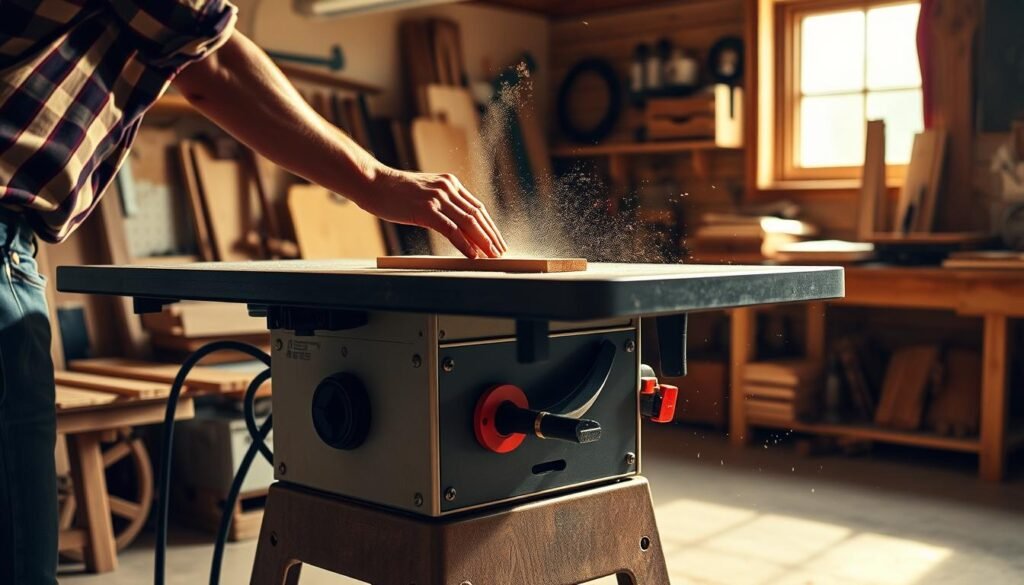

For DIYers, learning table saw techniques is key to better projects. Using efficient cutting methods saves time and money. By improving rip cut methods and crosscut precision, DIYers can make their work much better.
Setting up your dado blade right and using saw efficiency hacks makes cutting easier. This article will show you how to get the most out of your table saw for rip cuts, crosscuts, and dadoes.
Key Takeaways
- Mastering table saw techniques improves project outcomes.
- Efficient cutting methods save time and reduce costs.
- Optimizing rip cut methods enhances work quality.
- Proper dado blade setup streamlines the cutting process.
- Saw efficiency hacks improve overall productivity.
Why Table Saw Efficiency Matters for DIYers
For DIY fans, using a table saw efficiently is key to finishing projects fast and saving money. A table saw is a must-have in many workshops. Its efficient use boosts your productivity and work quality.
Time-Saving Benefits of Mastering Your Table Saw
Learning to use your table saw well can save you a lot of time. By using saw efficiency hacks like correct fence alignment and the right feed rate, you’ll work faster and more accurately. Keeping your table saw in top shape and set up right means less time on each cut. This lets you work on other parts of your project.
Also, knowing how to use tools like a riving knife makes your work safer and more efficient. It stops kickbacks and makes cuts smooth. This saves time and lowers accident risks.
Cost Efficiency Through Precision Cutting
Accurate cuts save money when using a table saw. Making precise cuts means less waste and fewer extra materials needed. This saves you money. Knowing about kerf width and its impact on cuts helps you get better results, saving even more.
Also, precise cuts mean less need for redoing work. This saves time and money. By spending time setting up your table saw right and using the best techniques, you get professional results without breaking the bank.
Essential Table Saw Tools & Safety Gear
The right tools and safety gear can make your table saw experience better. It becomes safer and more productive. Knowing the essential tools and safety gear is key for great woodworking projects.
Must-Have Accessories for Optimal Performance
Some accessories are a must for your table saw. They boost your cuts’ accuracy and make your workspace safer.
Featherboards and Push Sticks
Featherboards and push sticks help control your workpiece. They keep it flat and moving smoothly. Featherboards press against the workpiece, while push sticks guide it safely.
Together, they cut down kickback risk and improve cut quality.
Aftermarket Fences and Miter Gauges
Upgrading to aftermarket fences and miter gauges boosts your table saw’s precision. These upgrades make your cuts more accurate and consistent. They’re great for projects needing high precision.
Safety Equipment You Should Never Work Without
When using power tools like table saws, safety comes first. Some safety gear is a must to avoid hazards.
Eye and Hearing Protection
Eye protection like safety glasses protects your eyes from debris. Heating protection, such as earplugs or earmuffs, keeps your hearing safe from the saw’s noise. These are must-haves for safe use.
Dust Masks and Proper Clothing
A dust mask keeps you from inhaling sawdust and particles. Wearing proper clothing that fits well and doesn’t get caught in the saw is also important. Avoid jewelry and keep long hair tied back.
Mastering Rip Cuts: Speed & Precision Techniques
Making perfect rip cuts is a mix of the right techniques and the right tools. It’s key to woodworking and needs you to know your table saw well.
Proper Fence Setup for Perfect Rips
A good fence setup is key for accurate rip cuts. It guides the wood for a straight cut.
Fence Alignment and Calibration
To align your fence right, make sure it’s parallel to the saw blade. Use precision tools to calibrate it perfectly.
Using Auxiliary Fences
Auxiliary fences add support and precision to your fence. They’re great for wide or long wood pieces.
Feed Rate Optimization for Clean Cuts
The speed at which you move the wood affects the cut quality. A steady feed rate prevents burning and gives a smooth finish.
Finding the right feed rate is about moving the wood fast enough to be efficient but slow enough not to overwhelm the blade.
Handling Long Stock Efficiently
Working with long wood needs extra support for control and safety. Good infeed and outfeed systems are key for managing long wood.
Infeed and Outfeed Support Systems
Infeed support guides the wood into the saw. Outfeed support catches the wood as it comes out, preventing falls or binding. These can be simple tables or rollers.
Maintaining Control Throughout the Cut
Keeping control during the cut is vital for safety and accuracy. This means keeping the wood against the fence and using a steady feed rate.
Flawless Crosscuts Every Time (Without a Miter Saw)
With the right tools, you can make perfect crosscuts on your table saw. Getting precise cuts is key for professional woodwork. You don’t need a miter saw to do it.
Building and Using a Crosscut Sled
A crosscut sled makes your cuts more accurate. To make one, you need plywood, runners for your table saw, and a fence.
Materials and Construction Tips
Use 3/4-inch plywood for a strong sled. Make sure the runners fit your table saw’s miter slots well. Your fence should be tall enough to hold your workpiece.
Ensuring Square Cuts Every Time
To get square cuts, your sled’s fence must be straight. Use a combination square to check and adjust it as needed.

Miter Gauge Techniques and Upgrades
A crosscut sled is very accurate, but a miter gauge works too. A high-quality miter gauge or a digital readout can make your cuts even better.
Preventing Tearout on Crosscuts
Tearout can mess up your cut. Using zero-clearance inserts and a backing board can help a lot.
Zero-Clearance Techniques
A zero-clearance insert keeps your workpiece close to the blade. This reduces tearout. You can make your own insert from plywood or MDF.
Backing Boards and Scoring Methods
A backing board also helps prevent tearout. Scoring the cut line before the full cut can lower tearout risk even more.
With these methods and tools, you can make flawless crosscuts on your table saw. They’ll be as precise as those from a miter saw.
Dadoes Made Easy: Stacked Blades vs. Wobble Blades
Making perfect dadoes needs precision and the right tools, whether you choose stacked blades or wobble blades. Dado cuts are key in many woodworking projects. The choice between stacked dado blades and wobble blades greatly affects the result.
Setting Up a Stacked Dado Set
Setting up a stacked dado set means arranging chippers and shims for the right dado width. This needs careful attention to get accurate cuts.
Chipper and Shim Configuration
Configuring chippers and shims is key for the correct dado width. By picking and arranging these parts, woodworkers can tailor their dado set for different projects.
Testing for Proper Width
After setting up the stacked dado set, test the width to check if it fits the project’s needs. This step is vital to avoid mistakes and get precise cuts.
Working with Wobble Blades
Wobble blades are an option to stacked dado sets, giving flexibility in dado widths. By changing the wobble blade’s position and angle, woodworkers can make different width cuts.
Achieving Precise Dado Widths and Depths
Getting precise dado widths and depths is essential for professional results. Using setup blocks and test cuts helps ensure accuracy.
Setup Blocks and Test Cuts
Setup blocks are very useful for setting the dado blade to the right width. Testing cuts on scrap wood also confirms the dado’s width and depth before starting the real project.
Dado Jigs for Consistency
For projects needing many dado cuts, a dado jig can improve consistency and speed. These jigs guide the workpiece, making sure cuts are even throughout the project.
Advanced Jigs for Repeatable Accuracy
Advanced jigs are key for better accuracy and repeatability in woodworking. They help you get professional results easily.
Building a Tapering Jig
A tapering jig is vital for precise angled cuts. You’ll need basic materials and careful planning to build one.
Single and Double Taper Designs
Tapering jigs come in single or double taper designs. Single tapers are good for simple cuts. Double tapers are better for complex projects.
Clamping Systems for Workpieces
Good clamping systems are key for keeping workpieces stable. This ensures accurate cuts.
Box Joint and Finger Joint Jigs
Box joints and finger joints are important for strong woodwork. Special jigs help make precise cuts for these joints.
Tenoning Jigs for Joinery
Tenoning jigs make tenons for mortise and tenon joinery easier. You can buy them or make your own.
Commercial vs. DIY Options
Commercial tenoning jigs are convenient and precise. DIY jigs are cheaper and customizable. Your choice depends on your needs and budget.
Setup and Operation Tips
Proper setup and use are essential for your tenoning jig. Make sure it’s aligned well and operates smoothly.
Here’s a comparison of these jigs:
| Jig Type | Precision Level | Ease of Use |
|---|---|---|
| Tapering Jig | High | Moderate |
| Box Joint Jig | Very High | Easy |
| Tenoning Jig | High | Moderate to High |
Using these advanced jigs can greatly improve your woodworking’s accuracy and quality.
Dust Collection Hacks for Cleaner Cuts
To get cleaner cuts and a safer workshop, you need a good dust collection system. It makes your work better and safer by cutting down on accidents from sawdust and debris.
Optimizing Built-in Dust Collection
Most table saws have a dust collection system. But, you can make it better. Optimizing your built-in dust collection means checking for blockages and leaks. Also, make sure the collection bag or vacuum fits your saw right.
Above-Table Collection Solutions
Adding above-table solutions can boost dust collection. You can use a dust hood or a custom shroud around the blade. These tools catch dust closer to the source, keeping your workshop cleaner.
Below-Table Extraction Improvements
Improving below-table extraction cuts down on airborne dust. Make sure the dust collection port is clear. Also, use a more powerful dust collector or shop vacuum.
DIY Dust Collection Solutions
If you’re on a budget or like DIY, there are many DIY dust collection solutions. You can make simple changes to shop vacuums or build complex systems.
Shop Vacuum Adaptations
Adapting a shop vacuum for your table saw is easy. Just make a custom adapter for the vacuum hose and the saw’s dust port.
Custom Shrouds and Barriers
Custom shrouds or barriers around the cutting area work great. You can use plastic, metal, or wood. They fit your workshop’s needs perfectly.
These dust collection hacks make your workshop cleaner and safer. Whether you improve your built-in system or go for DIY, the benefits are huge. Cleaner cuts and a healthier work environment are worth the effort.
Table Saw Blade Selection Guide
Choosing the right table saw blade is key for precise cuts and efficiency in woodworking. The type of blade affects your work’s quality. It’s important to know the differences between various blade types.

Rip Blades: When and Why to Use Them
Rip blades are for making cuts with the wood grain. They have fewer teeth than crosscut blades. This makes them fast and efficient for cutting thick lumber.
Tooth Count and Geometry
The number and shape of a rip blade’s teeth are key. Rip blades usually have 24 to 40 teeth. Their design is for quick material removal.
Material-Specific Recommendations
For hardwoods, use a rip blade with carbide-tipped teeth. It’s durable and resists wear. For softwoods, a blade with more teeth gives a smoother finish.
Crosscut Blades for Smooth Finishes
Crosscut blades are for cutting across the wood grain. They have more teeth than rip blades. This design helps achieve a smooth finish.
Tooth Configuration for Clean Cuts
Crosscut blades are made for clean cuts. They have 60 to 80 teeth. This high tooth count leads to a smoother finish.
Specialty Crosscut Blades
There are special crosscut blades for tasks like cutting plywood or MDF. These blades reduce tearout and ensure a smooth finish.
Combination Blades: The Best of Both Worlds
Combination blades do both rip cuts and crosscuts. They’re great for woodworkers who need to do various tasks.
Everyday Cutting Applications
Combination blades work well for everyday tasks. They balance the speed of a rip blade with the finish quality of a crosscut blade.
Limitations and When to Switch
While versatile, combination blades may not be best for specialized tasks. Switch to a dedicated rip or crosscut blade for high-precision or specific tasks.
Troubleshooting Common Table Saw Problems
Learning to fix table saw problems is key for woodworkers. Even with regular care, issues can pop up. These can affect how well your table saw works and how safe it is.
Eliminating Burn Marks on Cuts
Burn marks on cuts often mean your blade is dull or you’re cutting wrong. To avoid burn marks, use a sharp blade right for the cut. Also, don’t cut too slow, as this can cause friction and burn marks. A zero-clearance insert helps cut cleaner and reduces tear-out.
Fixing Blade Wobble and Vibration
Blade wobble and vibration can ruin your cuts and harm your table saw. There are a few things to look at to fix these problems.
Blade Balance and Runout
First, check if your blade is balanced. An unbalanced blade vibrates a lot. Use a balancing tool to make sure it’s balanced. Also, measure the blade’s runout to see if it’s off.
Motor and Arbor Issues
Motor and arbor problems can also cause vibration. Make sure the arbor is tight and the motor is straight. Any looseness or misalignment can make the blade vibrate and perform poorly.
| Issue | Cause | Solution |
|---|---|---|
| Blade Wobble | Unbalanced blade, arbor looseness | Balance blade, tighten arbor |
| Vibration | Misaligned motor, poor blade quality | Align motor, replace blade |
Dealing with Kickback Issues
Kickback is a big safety risk with table saws. Knowing how to stop and handle kickback is very important.
Prevention Techniques
To stop kickback, always use a riving knife or splitter. Make sure it’s set right with your blade. Keep your feed steady and don’t touch the blade. Using a push stick or other safety tools can also prevent accidents.
Riving Knife and Splitter Setup
The riving knife or splitter should be set close to the blade but not touching it. This stops the workpiece from pinching the blade, which can cause kickback.
“The key to safe and effective table saw operation is understanding and mitigating possible hazards like kickback.”
By tackling these common problems, you can make your table saw work better and safer. This will make your woodworking projects better.
Pro Tips for Cutting Small or Thin Stock Safely
When cutting small or thin stock on a table saw, safety is key. There are several pro tips to help you stay safe. Cutting these pieces can be tricky and requires extra care to avoid accidents.
Zero-Clearance Inserts for Thin Material
Using zero-clearance inserts is a great way to improve safety when cutting thin stock. These inserts prevent small pieces from falling into the gap around the blade. This reduces the risk of kickback.
Commercial vs. DIY Options
Zero-clearance inserts can be bought or made at home. Commercial inserts are convenient and fit specific table saw models. DIY inserts can be customized to fit your needs and are often cheaper.
Installation and Adjustment
Installing a zero-clearance insert needs careful adjustment to match the table saw surface. Proper installation is key to preventing kickback and improving cut quality.
Using Push Blocks and Featherboards Effectively
Push blocks and featherboards are vital for safely cutting small or thin stock. Push blocks keep your hands away from the blade. Featherboards apply pressure to the stock, helping to control it and prevent kickback.
Using these tools well takes practice. Featherboards should apply gentle pressure against the stock, keeping it against the fence.
Alternative Methods for Very Small Pieces
For very small pieces, you might need to use alternative methods for safety. Sled-based solutions and other specialized jigs can help with precise cuts.
Sled-Based Solutions
Sleds are great for cutting very small pieces. They provide a stable platform that can be guided through the saw blade, reducing the risk of accidents.
When to Use Other Tools Instead
For some cuts, it’s safer to use tools other than a table saw for small or thin stock. For example, a bandsaw or a jigsaw might offer better control and safety.
| Tool | Safety Feature | Best Use |
|---|---|---|
| Zero-Clearance Insert | Prevents kickback | Thin stock |
| Push Blocks | Keeps hands away from blade | Small stock |
| Featherboards | Applies pressure to stock | Thin and small stock |

Beyond Basics: Curved Cuts & Joinery on a Table Saw
A table saw can do more than just straight cuts. It’s great for curved cuts and advanced joinery. With the right techniques and tools, it becomes a key part of your woodworking tools.
Creating Rabbets and Grooves
Rabbets and grooves are key in many woodworking projects. You can make them with a dado blade set. There are two main ways: dado stack methods and multiple-pass techniques.
Dado Stack Methods
A dado stack has two outer blades and several chipper blades. You can stack them to get the right groove width. This method gives you precise control.
Multiple-Pass Techniques
If you don’t have a dado set, you can use a standard blade for multiple passes. This method needs careful setup and execution.
Advanced Joinery Techniques
Advanced joinery can make your woodworking projects better. Techniques like spline joints and miter joints add strength and beauty.
Spline Joints and Miters
Spline joints use a thin wood piece in slots for extra strength. Miter joints are for clean corner connections.
Lap Joints and Bridle Joints
Lap joints overlap wood pieces, while bridle joints create strong, interlocking joints. Both are useful in furniture making and other projects.
When to Use Your Table Saw vs. Other Tools
While a table saw is versatile, other tools are better for some tasks. Curved cuts are often best done with a jigsaw or bandsaw. Knowing each tool’s strengths helps you pick the right one for the job.
Conclusion: Work Smarter, Not Harder
Learning to use your table saw well is key to better woodworking. By using the tips from this article, you can make your work more efficient. This will help you work smarter, not harder.
Improving your rip cuts and crosscuts is important. So is using advanced jigs and dado techniques. These steps help you work more precisely and save time. You’ll feel more confident in tackling tough projects.
As you get better, your table saw will become a vital part of your workshop. Using the right techniques and keeping your tools in good shape will boost your productivity. You’ll make professional-quality work.
The secret to getting the most out of your table saw is knowing its strengths and weaknesses. This knowledge lets you work more efficiently. You’ll waste less and make projects that show off your skill.
What is the best way to ensure accurate rip cuts on a table saw?
To get accurate rip cuts, align and calibrate the fence right. Use a sharp blade and keep a steady feed rate. A riving knife or splitter can also help prevent kickback and improve your cuts.
How do I prevent tearout when making crosscuts on a table saw?
Prevent tearout by using a zero-clearance insert or a scoring blade. A backing board or crosscut sled can also help. Choose a sharp crosscut blade with a high tooth count and a negative hook angle.
What is the difference between a stacked dado set and a wobble blade?
A stacked dado set has multiple blades stacked to get a specific width. A wobble blade is adjusted to get the desired width. Stacked sets are more precise but wobble blades are easier for simple cuts.
How do I optimize dust collection on my table saw?
To improve dust collection, make sure your table saw’s system is set up and maintained well. Use a shop vacuum or a dedicated dust collector. Also, install a dust hood or shroud around the blade.
What are some safety tips for cutting small or thin stock on a table saw?
When cutting small or thin stock, use a zero-clearance insert, push blocks, and featherboards. This helps control the workpiece and prevents kickback. Always use a sled or jig for support and keep your hands away from the blade.