

Making misaligned cuts during a DIY project can be frustrating and costly. Whether you’re working with wood, metal, or plastic, a misaligned cut can throw off the entire project. This leads to wasted materials and time.
Understanding why misaligned cuts happen is key to preventing them. Common causes include faulty equipment, incorrect measurements, or human error. Spotting the problem early is essential to salvage the project.
This article will explore creative solutions for fixing misaligned cuts. We’ll look at quick fixes, specialized tools, and design techniques to disguise mistakes.
Key Takeaways
- Understand the causes of misaligned cuts to prevent them.
- Spot problems early to salvage your project.
- Use creative solutions to fix misaligned cuts.
- Employ specialized tools for realignment.
- Disguise mistakes with design techniques.
Understanding Why Misaligned Cuts Happen
Misaligned cuts can be frustrating. They often come from tool problems or environmental factors. These issues can slow down DIY projects and increase costs. Knowing why they happen is key to solving them.
Tool Calibration Issues
Tool alignment issues are a big reason for misaligned cuts. If tools aren’t set right, cuts won’t be accurate. Regularly checking and adjusting tool settings can solve this problem.
Material Movement During Cutting
Material movement is another cause of misaligned cuts. If the material moves while cutting, the cut won’t be right. Using clamps or other devices can help keep it steady.
Measurement and Marking Errors
Cutting errors DIY projects often come from wrong measurements or marks. Double-checking and using clear marks can help. High-quality measuring tools also make a difference.
Environmental Factors Affecting Precision
Temperature and humidity can also affect cuts. Changes in these can make materials expand or contract. Knowing this and adjusting work can help.
By understanding and fixing these common causes, DIY fans can improve their projects. They can correcting inaccurate cuts and enhance their work’s quality.
Spotting Misalignment Problems Early
Misaligned cuts can really slow you down. But catching them early can save a lot of time and effort. In woodworking, finding cutting errors quickly is key to keeping your work top-notch and on schedule.
Visual Inspection Techniques
Looking closely at your cuts is a simple way to spot problems. Woodworkers can see if something’s off by checking the edges and surfaces. Good lighting and magnification tools help make this job easier.
Using Reference Tools and Squares
Reference tools and squares are vital for checking your cuts. They help you see if your edges are square or if there’s an issue. Make sure to calibrate these tools regularly to keep them precise.

Test Fitting Components Before Assembly
Trying out your parts before you put them together is smart. It lets you fix any alignment issues before they become big problems. This way, you avoid headaches later on.
Common Signs of Problematic Cuts
Some signs show if your cuts are off. Look for uneven edges, gaps, and obvious misalignments. Knowing these signs helps you fix problems fast.
| Signs of Misalignment | Description | Corrective Action |
|---|---|---|
| Uneven Edges | Edges that are not straight or have irregularities | Sanding or trimming to achieve a straight edge |
| Gaps Between Joints | Spaces between joined components | Adjusting the fit or using shims to fill gaps |
| Visible Discrepancies | Obvious misalignments visible to the naked eye | Re-cutting or re-aligning components |
Quick Fixes That Save the Project
When misaligned cuts threaten to derail a project, quick fixes can save the day. Misaligned cuts are common in woodworking and DIY projects. But, with the right techniques, you can adjust your cuts mid-project and keep your work on track.
Shimming Techniques for Gap Filling
Shimming techniques are great for filling gaps caused by misaligned cuts. Shimming involves using thin pieces of material (shims) to fill gaps. This method is perfect for wood projects, as it ensures a snug fit without altering the original pieces too much.
Choosing the right shim material is key. It should match the materials you’re working with and not affect the project’s finish.
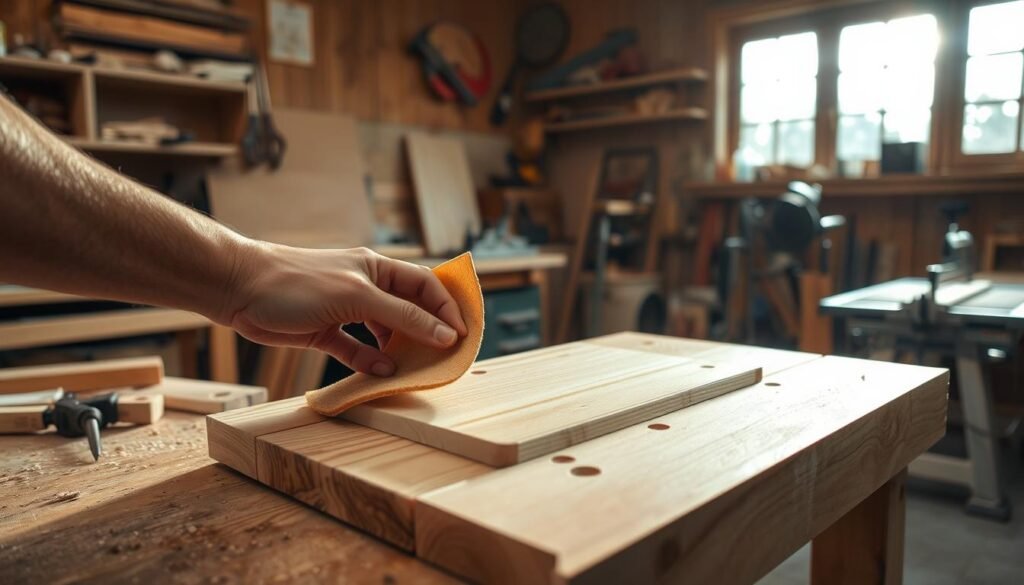
Sanding and Trimming Solutions
Sanding and trimming are quick fixes for misaligned cuts. By sanding down or trimming the edges, you can get a better fit. This method needs patience and precision to avoid taking off too much material.
- Use progressive grits of sandpaper for a smooth finish.
- Trim carefully to avoid further misalignment.
Adhesive Tricks for Repositioning
The right adhesive can help reposition misaligned cuts. Using flexible adhesives or applying adhesive in specific spots can align components as they dry.
“The key is in the application”; applying even pressure and letting the adhesive dry completely are key steps.
Clamping Methods for Realignment
Clamping is a simple way to realign misaligned cuts. By using clamps strategically, you can gently push the pieces into place. It’s important to use the right clamps and avoid too much pressure, which could damage the material.
Fixing Misaligned Cuts Mid-Project: Creative Solutions for Salvaging Mistakes
Fixing misaligned cuts in a project means knowing the material and the right fix. Each material needs a specific repair method. The right approach can greatly improve the outcome.
Wood-Specific Repair Methods
Wood is easy to repair. You can use wood filler and putty, or make scarf joints or custom patches.
Wood Filler and Putty Applications
Wood filler and putty are great for filling gaps and holes. They can be sanded to a smooth finish, making the repair almost invisible. For big gaps, choose a wood filler that matches the wood color well.
Scarf Joints and Custom Patches
Scarf joints involve cutting out the damaged area and adding a new piece of wood. This creates a strong joint. Custom patches can also cover up big misalignments.

Metal Repair Techniques
Metal repairs need special skills and tools. Welding and soldering are key for fixing metal cuts.
Welding and Soldering Fixes
Welding melts metal to join pieces, while soldering uses a lower temperature. Both need precision and the right tools.
Using Metal Epoxy and Fillers
For small misalignments, metal epoxy and fillers can fill gaps. These harden to form a strong bond that can handle stress.
Plastic Material Solutions
Plastic repairs can be tricky because of its varied properties. But, heat manipulation and plastic welding are effective solutions.
Heat Manipulation Methods
Heat can soften plastic, allowing it to be reshaped. This method needs careful temperature control to avoid damage.
Plastic Welding and Chemical Bonding
Plastic welding melts plastic to join it, while chemical bonding uses adhesives for plastics. Both can make strong, lasting repairs.
| Material | Repair Technique | Skill Level |
|---|---|---|
| Wood | Wood Filler/Putty, Scarf Joints | Intermediate |
| Metal | Welding, Soldering, Metal Epoxy | Advanced |
| Plastic | Heat Manipulation, Plastic Welding | Intermediate to Advanced |
Essential Tools for Realigning Miscut Projects
When you face misaligned cuts, the right tools are key to saving your project. Realignment needs precision, patience, and the right tools. We’ll look at the must-have tools for fixing misaligned cuts and getting your project back on track.
Precision Measuring Instruments
When realigning, precision is essential. Precision measuring instruments like digital calipers, micrometers, and dial indicators are vital. They help measure accurately and guide the realignment process.
Specialized Clamps and Alignment Jigs
Specialized clamps and alignment jigs are critical for adjustments. They offer the support needed for precise adjustments, ensuring corrections are accurate.

Cutting and Trimming Tools for Corrections
For correcting misalignments, cutting and trimming tools are essential. Jigsaws, coping saws, and precision knives allow for precise cuts and adjustments.
Alignment Aids Worth Investing In
Tools like alignment aids – laser levels, alignment lasers, and straight edges – greatly improve realignment. They help achieve perfect alignments and restore the project to its original specifications.
| Tool Category | Examples | Use |
|---|---|---|
| Precision Measuring Instruments | Digital Calipers, Micrometers | Accurate Measurements |
| Specialized Clamps and Alignment Jigs | F Clamps, Alignment Jigs | Holding Parts in Place |
| Cutting and Trimming Tools | Jigsaws, Coping Saws | Making Corrections |
| Alignment Aids | Laser Levels, Straight Edges | Achieving Perfect Alignments |
Disguising Mistakes with Design Elements
With the right techniques, misaligned cuts can become unique design elements. This approach not only saves the work but also adds character to it.
Incorporating Decorative Features
Decorative features can hide misaligned cuts. Decorative trim can cover gaps or uneven edges. Intricate designs or patterns can also distract from the misalignment, focusing the eye on the aesthetic elements.
Strategic Trim and Molding Placement
Trim and molding placement can also hide misaligned cuts. By placing these elements carefully, you can create a visual distraction that hides the error. For example, a decorative molding around a misaligned joint can make it less noticeable.
Finishing Techniques to Hide Flaws
Finishing techniques are key in disguising mistakes. Staining or painting can blend misaligned areas with the rest of the project. A clear coat can also enhance the appearance, making flaws less visible.
Turning Mistakes into Intentional Design Features
Sometimes, embracing the mistake and turning it into a design feature is the best approach. A misaligned cut can become a unique edge detail or a characteristic flaw that adds charm. This requires creativity but can result in a truly unique piece.
By using these strategies, you can effectively hide misaligned cuts and turn mistakes into design strengths.
When to Fix vs. When to Start Over
When you face a misaligned cut, deciding to repair or restart is key. Misaligned cuts can harm the quality and strength of your project.
Evaluating the Severity of Misalignment
First, check how bad the misalignment is. Small issues might be fixed easily, but big ones could ruin the project’s structure. Measure the deviation and think about the material’s flexibility and the project’s design.
Considering Project Timeline and Budget Constraints
Think about your project’s time frame and budget. Fixing a cut might take more time and money. If the fix costs too much or delays your project, it might be better to start over.
Structural Integrity Concerns
The project’s safety is most important. If a cut makes the project unsafe, it’s safer to start again. Check if the misalignment affects how well the project works or its safety.
Decision-Making Framework for DIYers
DIYers should look at the misalignment’s severity, their project’s schedule and budget, and safety concerns. By considering these, they can choose to fix it or start over.
Preventing Future Misaligned Cuts
By following a few simple steps, you can lower the chance of misaligned cuts. This keeps your project on track and of high quality. It’s key to the success of your work.
Tool Maintenance and Regular Calibration
Keeping your tools in good shape and calibrated is essential. Make sure your cutting tools are well-maintained and all parts move smoothly. Follow the maker’s guide for calibration to ensure your cuts are accurate.
Creating Effective Cutting Templates and Jigs
Using templates and jigs can make your cuts more precise. Make templates for repeated cuts to keep your work consistent. Jigs help guide your tools, cutting down on mistakes.
Proper Material Support Techniques
Good material support stops the material from moving during cutting. Use clamps or vices to hold the material in place. For big pieces, add extra support to stop them from bending or sagging.
Measurement and Marking Best Practices
Getting your measurements right and marking them clearly is vital. Double-check your measurements before you cut. Use a sharp marker or pencil for clear marks. A story stick or template can help transfer measurements accurately.
By using these tips, you can cut down on misaligned cuts. This will help make your project a success.
Conclusion: Mistakes Make Better Craftspeople
Mistakes are a normal part of DIY projects. They can help you grow and learn. By fixing misaligned cuts, woodworkers can turn failures into valuable lessons.
Having a good diy troubleshooting guide is key. It helps you fix mistakes and move forward. Techniques like shimming, sanding, and trimming can fix bad cuts. DIY repair methods can also fix your project.
Remember, fixing mistakes is as important as making the project. Being flexible and adaptable helps. This way, you not only fix your project but also improve your skills for the future.
With time and effort, you’ll get better at fixing mistakes. What seemed hard at first will become a chance to learn and improve.
What are the most common causes of misaligned cuts in DIY projects?
Misaligned cuts often come from tools not being set right. They can also happen when materials move during cutting. Other causes include mistakes in measuring and marking, and factors in the environment that affect precision.
How can I spot misalignment problems early in my project?
Look for signs of misalignment by inspecting your work visually. Use tools like squares to check alignment. Try fitting parts together before you assemble them. Look for common signs of cuts gone wrong.
What are some quick fixes for salvaging misaligned cuts?
To fix misaligned cuts, you can use shims to fill gaps. Sanding and trimming can also help. Adhesives can be used to move parts back into place. Clamps can help realign parts.
How do I fix misaligned cuts in different materials like wood, metal, and plastic?
Fixing cuts in different materials needs different methods. For wood, use fillers and putty. For metal, try scarf joints or welding. Plastic can be fixed with special adhesives or heat.
When should I fix a misaligned cut versus starting over?
Decide based on how bad the cut is. Think about your time and budget. Check if the cut affects the structure. Use a framework to make your decision.
How can I prevent future misaligned cuts in my DIY projects?
Keep your tools in good shape and calibrate them regularly. Make accurate cutting templates and use them. Support materials properly and mark them well to avoid cuts gone wrong.