

Achieving Perfect Measurements is key in DIY projects. It affects the quality of the final product.
Getting accurate measurements means all parts fit well. This cuts down on waste and saves time.
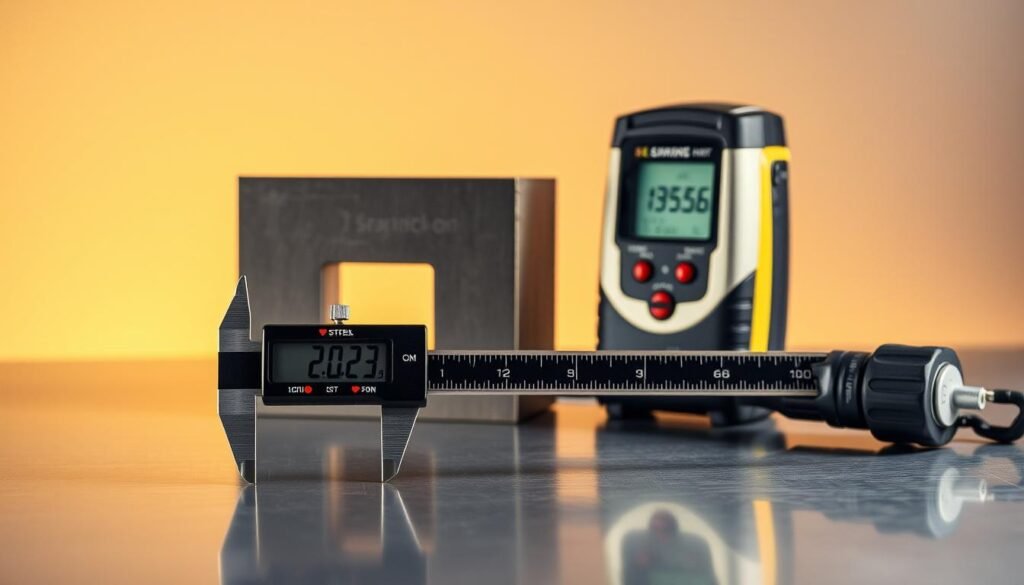
There are many measurement tools for DIY fans. Digital calipers, combination squares, and laser measures help with precision measuring.
Learning DIY measuring techniques is important. It helps make perfect cuts every time. This boosts the quality of your projects.
Key Takeaways
- Precision is key to successful DIY projects.
- Accurate measurements reduce material waste.
- Various measurement tools are available for DIY projects.
- Mastering measurement techniques is essential for quality outcomes.
- Using the right tools ensures perfect cuts and fits.
Why Precision Measurement Matters in DIY Projects
Precision measurement is key to a successful DIY project. It makes sure every cut, drill, and assembly is done right. The difference between success and failure often comes down to how accurate your measurements are.
The Real Cost of Measurement Errors
Measurement mistakes can cost a lot of money and time. A tiny error can make materials useless, forcing you to spend more on new ones. For example, a 1/16 inch discrepancy in woodworking can ruin the fit of joints. This can harm the project’s look and strength.
| Error Type | Potential Cost | Impact on Project |
|---|---|---|
| Material Miscalculation | $50 – $100 extra for rework | Delays project completion |
| Inaccurate Cutting | $20 – $50 per piece | Compromises structural integrity |
| Misaligned Assembly | $100 – $500 for adjustments | Affects overall project quality |
How Precision Affects Project Quality and Fit
Precision in measurement greatly affects the quality and fit of DIY projects. When measurements are accurate, parts fit together perfectly. This boosts the project’s durability and looks. It’s very important for projects needing precise joinery or fitting parts together.
Case Study: When 1/16″ Makes All the Difference
Think about a simple shelving unit project. A 1/16 inch error in measuring the shelf length can cause shelves to not fit right. This leads to an uneven look and possible structural problems. Using precise tools helps avoid these issues, ensuring a professional finish and saving on rework costs.
Essential Measuring Tools for the Modern DIYer
The modern DIYer needs a good set of measuring tools. Accurate measurements are key to any project’s success. The right tools can greatly improve the quality of your work.
Basic vs. Advanced Measurement Tools
For beginners, simple tools like tape measures and squares are enough. But for more complex projects, you’ll need advanced tools. Digital calipers, for example, can measure to 0.001″, which is very precise.
Building Your Measurement Toolkit Strategically
Start your toolkit with the basics and add more tools as you need them. Think about the projects you’ll do most often. Choose tools that fit your needs.
When to Invest in Premium Tools vs. Budget Options
Choosing between premium and budget tools depends on how often you’ll use them. If you’re a pro or serious DIYer, Starrett tools might be worth it. They’re accurate and durable. But for occasional use, Harbor Freight tools are a good choice.
Tool Quality Comparison: Harbor Freight vs. Starrett
| Feature | Harbor Freight | Starrett |
|---|---|---|
| Accuracy | Good for casual use | High precision |
| Durability | Moderate | High |
| Price | Budget-friendly | Premium |
Knowing the differences between budget and premium tools helps you make smart choices for your toolkit.
Mastering Digital Calipers for Accuracy to 0.001″
To get accurate results in DIY projects, knowing how to use digital calipers is key. These tools are great for precise measurements. They are a must-have for both DIY fans and professionals.
Understanding Caliper Types: Digital, Dial, and Vernier
First, let’s look at the different calipers. You have digital, dial, and Vernier calipers. Digital calipers are easy to use and show measurements in both metric and imperial units. Dial calipers have a dial for measurements. Vernier calipers need you to read from a Vernier scale.
Step-by-Step Technique for Inside Measurements
To measure inside with digital calipers, do this:
- Open the caliper jaws wide enough to fit inside the object.
- Close the jaws until they touch the inside surfaces.
- Read the measurement on the digital display.
Step-by-Step Technique for Outside Measurements
For outside measurements:
- Place the object between the caliper jaws.
- Close the jaws until they gently touch the object.
- Take the reading from the digital display.
Step-by-Step Technique for Depth Measurements
To measure depth:
- Extend the depth probe.
- Insert the probe into the hole or cavity.
- Read the measurement on the display.
Troubleshooting Common Caliper Reading Errors
Some common problems with digital calipers include:
| Issue | Solution |
|---|---|
| Inaccurate readings | Check battery level and ensure proper calibration. |
| Jaw misalignment | Clean and adjust the jaws. |
By learning how to use digital calipers and fix common problems, DIY fans can get very accurate measurements. This improves the quality of their projects.
Speed Square Techniques Beyond Basic Marking
Speed squares are more than just for marking straight lines. They help make DIY projects easier. These tools are great for framing and finishing work.
Multi-Function Applications You Never Knew About
Speed squares are versatile. They’re not just for marking straight lines. They can be used for:
- Finding and marking precise angles
- Creating layouts for rafters and stairs
- Serving as a saw guide for making straight cuts
- Checking for square and plumb
Step-by-Step Guide to Finding and Marking Angles
Accurate angle marking is key for many DIY projects. Here’s how to use a speed square:
- Place the speed square on the workpiece, aligning it with the edge.
- Rotate the square until you reach the desired angle.
- Mark along the edge of the square to create a precise angle.
Using Speed Squares for Rafter Layout
Rafter layout is vital for framing a roof. Speed squares make this task easier:
- Use the square’s degree scale to mark the angle of the rafter.
- Align the square with the rafter’s edge and mark the cut line.
Quick Reference: Common Angle Settings
| Angle | Common Use |
|---|---|
| 30° | Rafter cuts for certain roof pitches |
| 45° | Common for framing and joinery |
| 60° | Used in some roof designs and decorative cuts |

Combination Squares: The Layout Multitool
In the world of precision, the combination square is key for both pros and hobbyists. It’s a tool that does it all, making it a must-have in any workshop.
Setting Up and Testing for Accuracy
First, make sure your combination square works right. Start by checking its 90° and 45° references against known standards. If it’s off, follow the maker’s guide to fix it.
Establishing Perfect 90° and 45° References
The combination square is famous for its 90° and 45° angles. Just lock it in and use it to mark or check your pieces.
Using the Depth Gauge and Scriber Effectively
The depth gauge and scriber are top features of a combination square. The depth gauge measures hole depths accurately. The scriber marks lines with precision.
Advanced Layout Techniques for Joinery
For joinery, the combination square is a game-changer. It helps lay out complex joints for perfect fits. With its features, you get precise and consistent joinery, boosting your project’s quality.
Laser Distance Measurers vs. Tape Measures
When working on DIY projects, accuracy and speed are key. Choosing between laser distance measurers and tape measures is important. Each tool has its own strengths for different projects.
When to Choose Laser Over Tape: Decision Guide
Laser distance measurers are fast and precise. They’re great for big projects or hard-to-reach spots. They’re perfect for measuring rooms, areas, and layouts quickly.
Key scenarios for choosing laser over tape include:
- Measuring long distances or large areas
- Projects requiring high precision
- Working in confined or hard-to-reach spaces
Techniques for Maximum Accuracy with Bosch and Leica Lasers
To get the most from Bosch and Leica lasers, follow these tips. Make sure the device is level. Use the right measurement mode. And watch out for environmental factors that might mess with accuracy.
“The precision offered by laser distance measurers is unparalleled, even for complex projects,” says a pro contractor. “By sticking to the manufacturer’s guidelines and knowing the tool’s limits, you can get very accurate measurements.”
Tape Measure Tricks for Eliminating Common Errors
Tape measures are old-school but effective if used right. To avoid mistakes, keep the tape straight and not twisted. Use the lock to keep the tape steady during measurement. And check the tape for wear and tear often.
Combining Methods for Room Layout and Large Projects
For big projects, mix laser distance measurers and tape measures. Lasers give quick, accurate measurements. Tape measures are better for small details or where lasers don’t work.
Knowing what each tool does best helps DIYers improve their work’s quality and speed.
Achieving Perfect Measurements Every Time: Error Prevention
Getting accurate measurements is a challenge that needs focus and the right methods. Even with top-notch tools, mistakes can happen if not used right. Knowing how to avoid these errors is key for DIY success.
Seven Common Measurement Mistakes and Their Solutions
Many measurement errors come from simple mistakes. These can be avoided with the right knowledge. For example, misreading scales or not considering material differences can lead to errors. Digital calipers, while precise, need to be calibrated correctly to avoid big mistakes.
To avoid these problems, it’s important to know your tools. For instance, learning how to use the zeroing function on digital calipers helps avoid mistakes. Always double-check your measurements before cutting or assembling.
- Ensure proper tool calibration
- Understand the material you’re working with
- Double-check measurements
Compensating for Material Variables and Tool Limitations
Different materials can change measurements. For example, wood can shrink or expand with humidity changes. Knowing these changes is vital for accurate measurements. Tools also have limits; a tape measure might not be as precise as a laser for long distances.
“The most important thing in measurement is not the tool itself, but understanding its limitations and how to work within them.” –
A seasoned craftsman
Creating Foolproof Verification Systems
Creating a verification system is a great way to prevent measurement errors. A simple method is the “measure twice, cut once” rule.
The “Measure Twice, Cut Once” Methodology in Practice
This saying is more than a phrase; it’s a practical way to ensure accuracy. By measuring twice, you confirm your first measurement was correct. This step can save time and materials.
In conclusion, perfect measurements every time require understanding common mistakes, accounting for material and tool limits, and using verification systems like “measure twice, cut once.” By using these strategies, DIY fans can improve their project’s quality and accuracy.
Measuring Odd Shapes and Curves
Getting precise measurements for odd shapes and curves is doable with the right tools. Whether it’s a custom furniture piece or a DIY project, getting the dimensions right is key for a perfect fit.
Using Contour Gauges and Flexible Rules Effectively
Contour gauges and flexible rules are key for measuring odd shapes. A contour gauge lets you copy an object’s shape by adjusting its pins or blades. It’s great for catching small details.
- To use a contour gauge well, press it hard against the object. This ensures the pins or blades match its shape.
- After capturing the shape, you can trace it onto your material to replicate it.
Flexible rules, by contrast, can bend to fit curved surfaces. They’re perfect for measuring around rounded edges or complex curves.

Step-by-Step Template Creation for Complex Shapes
Making a template is a smart way to measure and copy complex shapes. Here’s how to do it:
- Choose a good material for your template, like cardboard or thin plywood.
- Put the material over the object or area you want to measure and trace its outline.
- Refine the template until it perfectly matches the shape.
- Use the template to transfer the measurements to your workpiece.
Digital Solutions: 3D Scanning for Ultimate Precision
For projects needing top accuracy, 3D scanning is a good choice. It captures an object’s geometry with high precision. This lets you create a digital model for further work or analysis.
Transferring Irregular Measurements to Your Material
After getting the measurements or making a template, the next step is to transfer them to your material. Use a sharp pencil or a marking gauge to trace the outline on your workpiece. For tricky shapes, use a mix of tools like calipers and a contour gauge for accuracy.
By using these methods and tools, you can get precise measurements for any shape or curve. This ensures your DIY projects turn out flawlessly.
Tool Calibration and Maintenance
Keeping your DIY projects in top shape means regular tool calibration and maintenance. Measuring tools that are calibrated right ensure your projects last longer. They also make sure parts fit together perfectly.
Step-by-Step Calibration for Digital Calipers
Digital calipers need regular calibration to stay accurate. First, clean them to get rid of any dirt. Next, reset them to zero and compare them to a known standard, like a gauge block. If needed, follow the maker’s guide to adjust them.
Testing and Adjusting Squares for Perfect 90°
To check if your squares are accurate, test them against a known 90° reference. If they’re off, you can fix them by bending the square or using shims to adjust the angle.
Maintenance Schedule to Ensure Continued Accuracy
Keeping your measuring tools in top shape is all about regular maintenance. This includes cleaning them after each use, storing them right, and checking them often for wear.
When to Replace vs. When to Recalibrate
Not every tool can be recalibrated; some need to be replaced when they lose accuracy. Whether to replace or recalibrate depends on the tool’s condition, age, and what the maker suggests.
| Tool | Maintenance Task | Frequency |
|---|---|---|
| Digital Calipers | Calibration Check | Monthly |
| Squares | Accuracy Test | Quarterly |
| Laser Distance Measurers | Battery Check and Calibration | Bi-Annually |
Material-Specific Measuring Techniques
Different materials need special measuring methods for the best results. Knowing these techniques is key for precise and quality DIY projects.
Wood: Accounting for Moisture, Movement, and Grain
Measuring wood involves considering moisture, movement, and grain direction. These factors can greatly impact measurement accuracy and project fit. Digital calipers help get precise measurements.
Metal: Temperature Considerations and Machining Allowances
Measuring metal requires watching temperature changes, as metal expands and contracts. Also, remember to include machining allowances for the right size. Laser distance measurers offer accurate readings.
Tile and Stone: Special Tools and Techniques
For tile and stone, the right tools and methods are essential. Contour gauges and flexible rules are great for capturing complex shapes. Be careful not to damage these materials during measurement.
Material-Specific Measurement Cheat Sheet
- Wood: Account for moisture, movement, and grain.
- Metal: Consider temperature and machining allowances.
- Tile/Stone: Use contour gauges and flexible rules.

Real-World Application: Building a Cabinet with Perfect Joinery
Creating perfect joinery in cabinet making starts with precise measurements and planning. The importance of accuracy is huge. It directly impacts the quality and fit of the cabinet.
Planning and Initial Measurements: Creating a Cutting List
The first step is making a detailed cutting list. You need to measure and calculate the parts needed. Precision here is key for the whole project.
| Component | Quantity | Dimensions |
|---|---|---|
| Sides | 2 | 18″ x 30″ |
| Top and Bottom | 2 | 24″ x 18″ |
| Shelves | 3 | 23″ x 17″ |
Critical Measurement Points for Cabinet Construction
Many measurements are key during cabinet making. These include the overall size, shelf placement, and drawer slide position. Double-checking these ensures perfect fit.
Using Story Sticks and Reference Edges for Consistency
Story sticks help keep measurements consistent. Marking important dimensions on a stick helps apply them everywhere. Reference edges also aid in keeping things accurate during assembly.
Final Fitting and Adjustment Techniques
The last step is fitting and adjusting the parts. This needs patience and detail. Even small mistakes can ruin the cabinet’s quality.
Troubleshooting When Measurements Don’t Match Up
If measurements don’t match, finding the problem is key. Issues can be wrong initial measurements, material warping, or cutting errors. By checking each step, you can find and fix the issue.
Conclusion: Measure Twice, Cut Once—Every Time
Precision measurement is key to successful DIY projects. Using tools like calipers, squares, and laser tools helps ensure your work is accurate and of high quality. This article has covered how to use digital calipers, squares, and laser tools for perfect measurements.
Using these techniques in your DIY projects will cut down on mistakes and boost your work’s quality. Whether you’re making a cabinet or a complex woodworking piece, precision is vital. Following the “measure twice, cut once” rule saves time, reduces waste, and leads to professional results.
As you keep working on DIY projects, remember that getting better at precision takes time and practice. Stick to using the right tools and methods, and you’ll see your work quality improve. With precision measurement, you can confidently take on any DIY challenge.
What is the most accurate way to measure small parts?
Digital calipers are the best for small parts. Brands like Mitutoyo and Starrett make high-quality ones. They can measure to 0.001″ accuracy.
How do I ensure my combination square is accurate?
Check your combination square against a known 90° reference. If it’s off, adjust it as the maker says. Regular checks and care keep it precise.
What’s the difference between a laser distance measurer and a tape measure?
Laser distance measurers use laser tech for quick, accurate readings. Tape measures need manual extension. Laser measurers are quicker for long distances. Tape measures are better for short, complex ones.
How do I measure odd shapes and curves accurately?
Contour gauges and flexible rules work well for odd shapes. You can also make a template from cardboard or thin wood. For complex shapes, 3D scanning is best.
Why is calibration important for measuring tools?
Calibration keeps your tools accurate. Tools can lose precision over time. Regular checks ensure your measurements are reliable.
What are some common measurement mistakes and how can I avoid them?
Mistakes include misreading scales and not considering material thickness. Always double-check and account for the kerf. Use a consistent edge for reference.